Home | Saltwater Flies | Fly Tying Materials | Saltwater Fly Fishing Accessories
Ordering Instructions, Shipping rates, Your Satisfaction Guaranteed | Site Map
Tying the Extreme Deceiver - Bluewater Special
Article by Blake Davis and Chris Windram. Photos by Blake Davis.
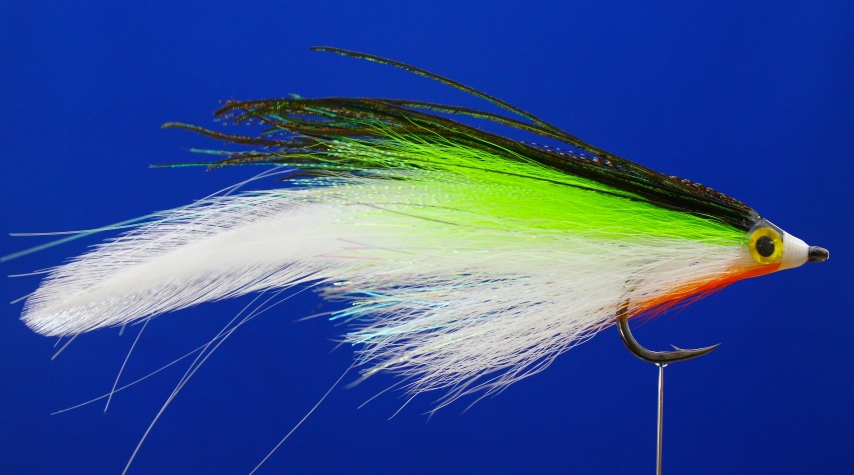
| The Deceiver style of fly as originally designed by Lefty Kreh is one of the world's most popular saltwater flies, and for good reason. This fly has been catching a broad variety of saltwater gamefish for years. The deceiver has also evolved into numerous variations to suit different game fish and fishing locations since its original design. However, at its most basic, it still includes a long hackle tail, and bucktail wings on the top and bottom of the fly. More elaborate versions, including our "Extreme Deceiver", are embellished with reflective eyes, an epoxy head, peacock herl, and layers of flash material. For years Saltwaterflies.com has offered many variations on this style of fly, with smaller ones often labelled "Maximum Deceivers". This newest version - the Extreme Deceiver - is just that; a large deceiver tied with some of the most extreme saltwater gamefish in mind - tuna, wahoo, roosterfish, giant trevally, big dorado, barracuda, and other species that require a well-balanced, durable fly, with a super strong hook. |
| While this article can serve as general instructions for tying a
deceiver, the pattern dressing outlined here is geared toward much larger versions of this pattern. Similar flies tied in smaller versions will make very effective flies for a huge range of species.
It is strongly suggested that you read through the entire tutorial once before starting to tie, to get an overview of the techniques used in tying this pattern - it will make a big difference if you can grasp the essential steps before getting started on this one. Materials |
While each tail requires only four feathers, I suggest having at least twice this amount ready and cut to length before you begin. This will allow you to select from multiple feathers and pair those with a similar curvature and stiffness, since this will likely not be the case with the first four feathers you choose. |
| Although it is possible to use strung hackle for the tail, I much prefer the long, stiff feathers from the bottom and center of a quality cape or saddle. The stiffness of the stem found on this type of feather can make them challenging to control, but produces a fly with a tail that is more durable and significantly less prone to fouling. |
| The materials listed here are to make the Extreme Deceiver in chartreuse and white, perhaps the most well-used colors for a deceiver pattern. However it is often made in blue and white as well as pink and white by offshore anglers, and is effective in both larger and smaller sizes than that shown here. |
Bucktail - quality chartreuse, white, and orange Bucktail Flash - chartreuse and black Krystal Flash; pearl Flashabou; and Polarflash Mirage Opal Thread - white 140 denier Ultra Thread or similar product Eyes - 1/4 Adhesive "Fly Eyes" Tail Feathers - high quality white saddle hackle with very straight, stiff feathers Peacock - Strung Peacock Herl Coatings - Loon Hard Head, penetrating head cement, and 30 minute epoxy |
Tying the Extreme Deceiver (Steps 1 to 5) |
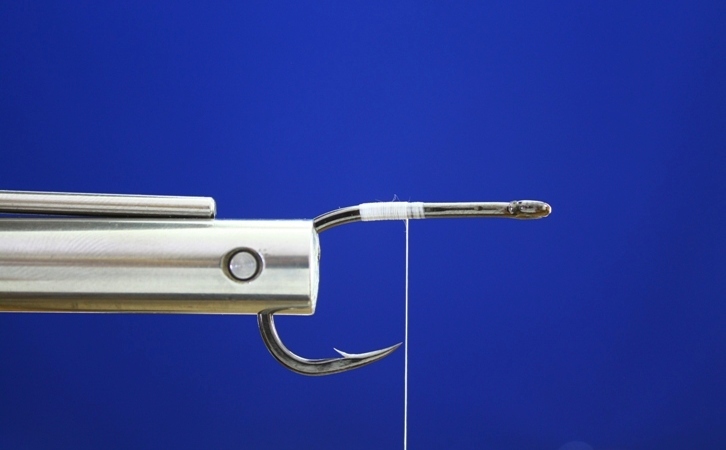
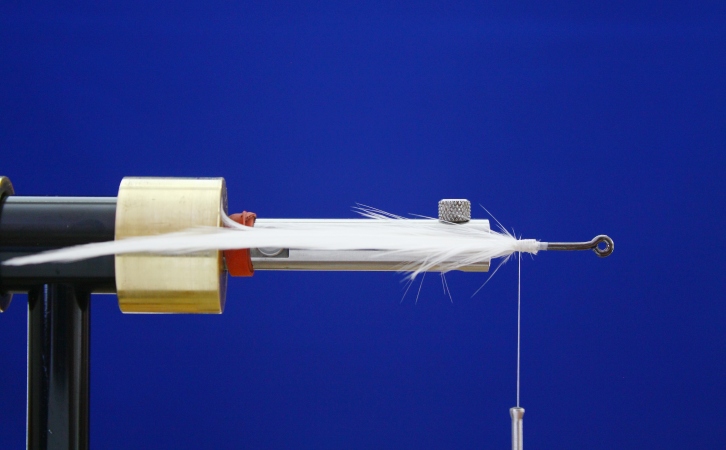
| Step 1: Beginning at the middle of the hook shank, make thread wraps toward the rear of the hook. Stop where the hook shank begins to bend and advance the thread back toward the hook eye. |
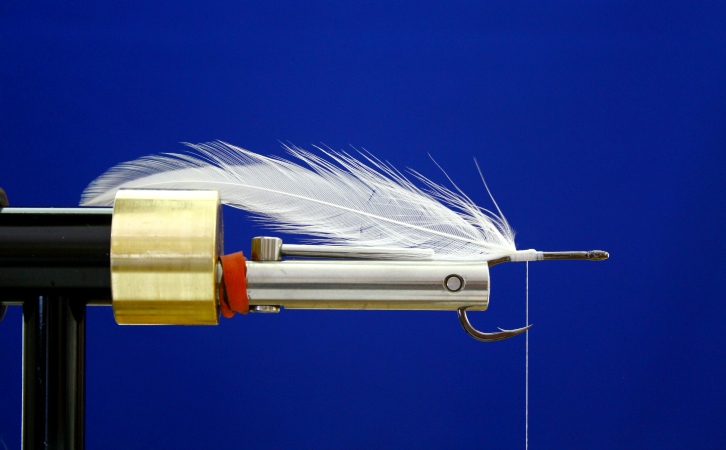
| Step 2: Select eight to twelve hackles from the center and bottom half of your saddle hackle and cut each feather to about six inches in length. Attach one feather with the stem on top of the hook and the concave section facing away. |
| If the feather torques to one side as you tighten your thread wraps, pinch it against the hook shank in the correct position with your thumb and forefinger. If the tail feather still will not stay upright, try placing the feather stem against the side of the hook shank instead of the top - or simple try another feather. This can take some patience. For an overhead picture of how this should look, click here. |
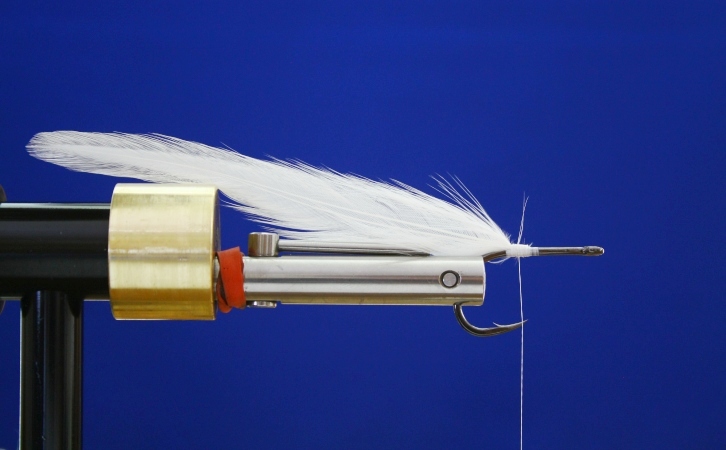
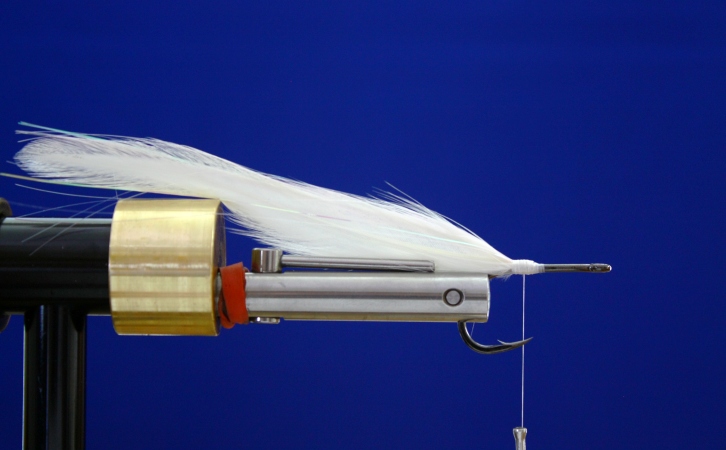
| Step 3: Select a hackle with roughly the same curvature and stiffness as the one attached to the hook. Place it next to the tied-in hackle so the concave parts of each feather face each other, and secure with thread wraps. This feather should be easier to attach, as it can be pressed up against and “anchored” to the stem of the other hackle. |
| While the tail of this fly should curve or point upwards slightly in relation to the axis of the hook shank, it should not be oriented in any other direction – just straight back or straight back and slightly up. Later when you are fishing this will ensure the fly is balanced and tracks straight when being retrieved and does not twist your leader during casting. |
| Step 4: Select two more hackles with the roughly the same curvature and stiffness and attach them to the sides of the two hackles secured to the hook. Since there will be no room for the hackle stems on top of the hook shank, these must be secured to the sides of the other stems. For a close-up of the "tie-in" point, click here. Viewed from above, the tail feathers should mesh into a single tail. (in the above photo the feathers "droop" to one side in the photo, just because the vise is rotated to one side.) |
| Step 5: Attach about 10 strands of pearl Flashaou and trim them to the length of the tail feathers, or slightly longer. Adding a drop of penetrating head cement or super glue (Dave's Flexament, Zap a Gap, or similar) to the thread wraps at this point will increase the durability of the fly. |