E-Z ZONKER / ANCHOVY ZONKER
Fly Pattern Recipe

Home | Saltwater Flies | Fly Tying Materials | Saltwater Fly Fishing Accessories
Ordering Instructions, Shipping rates, Your Satisfaction Guaranteed | Site Map
Fly Pattern Recipe
Dan Byford's Zonker fly is a streamer classic. This rabbit-winged pattern was originally tied inverted with a keeling lead belly and a mylar tubing overbody back in the 1970's for trout. It was a "new wave" style of streamer pattern at the time, completely different from the conventionally tied featherwing and bucktail streamers that had been popular since the 1920's.
The E-Z Zonker is an updated version of the original Zonker that utilizes a stiff modern tubing that prevents the wing from fouling during the cast. I started tying these around 1996 or so and was thrilled with the tying ease and simplicity of the pattern as well as the rabbit strip's unwillingness to foul. Of course, I thought that I had invented the ultimate Zonker but, to be safe, I checked Jack Gartside's book Flies for the 21st Century (Self-published, 1993) to see if he had already contemplated this design. Lo and behold, there it was listed as the Rabbit Corsair under the "Matuka-type Flies" heading. Jack tied his Rabbit Corsair patterns with thick (1/2") tubing and a wide profile to imitate short, stocky baits like sculpins, mummichogs and killies. The E-Z Zonker is designed to be representative of more diminutive and thinner baits like silversides, bay anchovies or other small minnows.
The E-Z Zonker is best tied with thin, size Small E-Z Body Tubing (Pearl color) and a thin wing of rabbit, mink, squirrel or just about any other short-haired animal. This fly is often my first choice when fly-thieving bluefish or spanish mackerel are on small baits as it is quick to tie and a lost E-Z Zonker isn't exactly a heartbreaker.
We've caught a plethora of species on this pattern from trout to skipjack tuna. Give it a try - you won't be disappointed.
Tying the E-Z Zonker

Step 1) Cut a 1 inch piece of pearl E-Z Body tubing and thread it on the hook shank like you would a rubber grub on a jig head, so that the tubing extends past the bend. First measure the hook against the tubing so that the end of the tubing is even with the hook eye. Note the spot where the hook bend would emerge from the tubing. Guide the hook point into the tubing and then poke it through the tubing at that predetermined spot. The tubing should meet the hook eye, but not extend over it. Cut the tubing to the proper length if it hangs over the hook eye. There is a slight curvature to the tubing that you want to point slightly UP past the bend. Also make sure to have the cotton string lateral line even on the sides of the tubing.
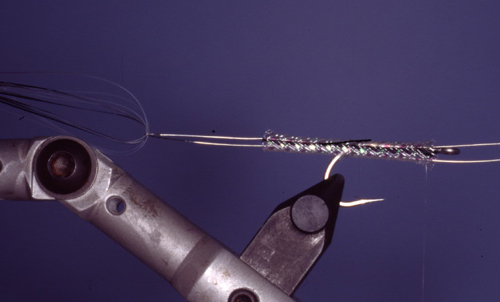
Step 2) Push the tubing back on to the bend and attach clear mono thread one eye length behind the hook eye. Insert a lightweight bobbin threader into the tubing. Cut off a dozen or so full-length strands of Flashabou and wet the tips with some saliva. Insert the wet tips into the threader and fold it so the threader halves the Flashabou.
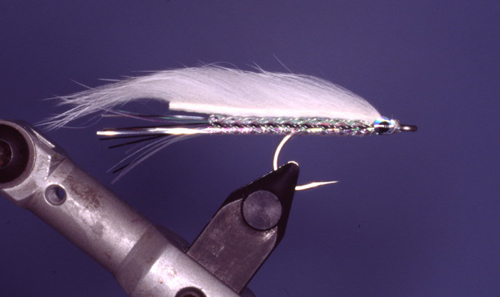
Step 3) Grasp both ends of the flash and pull the Flashabou into the tubing with the threader and tie down with the clear thread. Trim the Flashabou so that it is about 1 inch longer than the E-Z Body tubing.
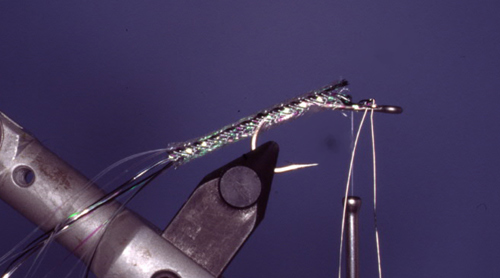
Step 4) Tie the tubing down behind the eye.
Step 5) Tie in a zonker strip at the head, making numerous wraps to build bulk. Be sure that the grain of the fur runs rearward. Trim the hide of the zonker strip (using a razor blade or just the tips of your scissors) so that it is at least 1 inch longer than the E-Z Body tubing.
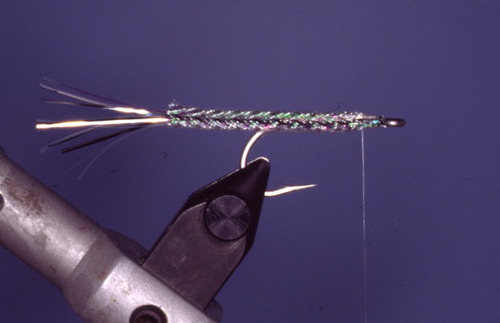
Step 6) Attach a prismatic eye to near side of the head with one turn of the clear thread. Repeat for the opposite side and whip finish in front of the eyes. Tie off and cut thread.
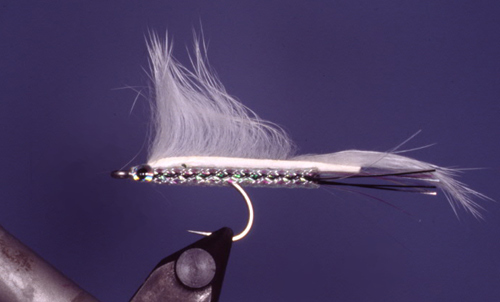
Step 7) Reverse the fly in the vise (so that the hook point is pointed back into the vise jaws and make a division in the rabbit fur near, but not at, the end of the tubing. A small amount of water or saliva makes the hair separation process easier.
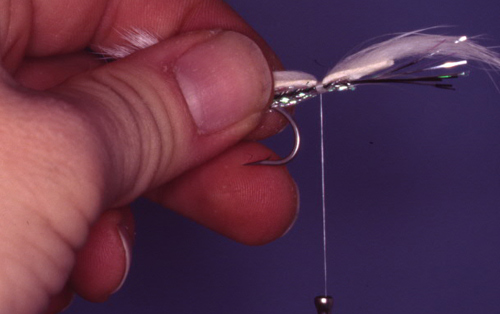
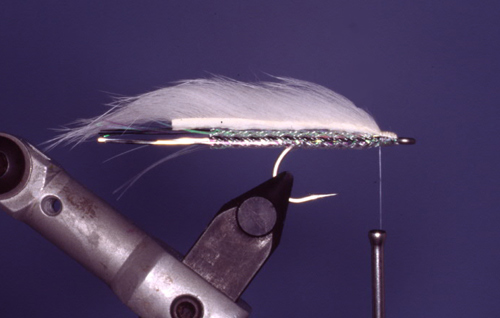
Step 8) Tie the tail end of zonker strip down to the tubing using 3/0 Monocord. I find the rear tie-down much easier to accomplish with the fly out of the vise, holding the fly at the bend in my fingers. Start by pulling out about 10 inches of thread and making several turns of thread around your pinky finger. Make sure the Zonker strip is taut along the top of the tubing and bring the thread up and over the tie-down point. Make at least a dozen strong, tight turns at the separation spot. Whip finish. A single-handed whip finish is the best method, but numerous half-hitches can also be used. Truly lazy tiers can apply super glue to the thread before making their final turns in place of a knot. Trim off the two thread tags and, with a bodkin, apply water-thin super glue to the rear tie-down point. Head cement will work here but super glue will make for a far tougher fly.
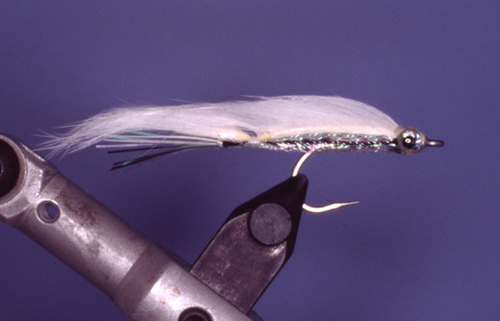
Step 9) Mix some epoxy and cover the prismatic eyes and you're fishing!
Saltwaterflies.com would like to thank professional fly tier, author, and photographer Dave Skok of Winthrop, Massachusetts for submitting this excellent article, and we would like to encourage all of our readers to visit Dave's highly entertaining website at the address shown below. Don't miss the "Humor" section of dwskok.com!
Dave Skok:
www.dwskok.com