WINDY'S TIPS AND TRICKS
Over the years there have been plenty of columns and articles featuring handy tips and advice for folks on making small tools and accessories for fly tying and other crafts, as well as for repairing, and maintaining fishing tackle and the like. On this page, I'd like to share with you some of the "tricks of the trade" that I've learned over the years. Some of these are my own ideas, and plenty of them have been borrowed from other fly tiers and anglers - I'll certainly try to give credit where credit is due. Some of these things will probably seem obvious to anyone who's tied flies for a while; my hope for this page is really just to illustrate some of these "tips" that other tiers might find useful or interesting. - Chris Windram
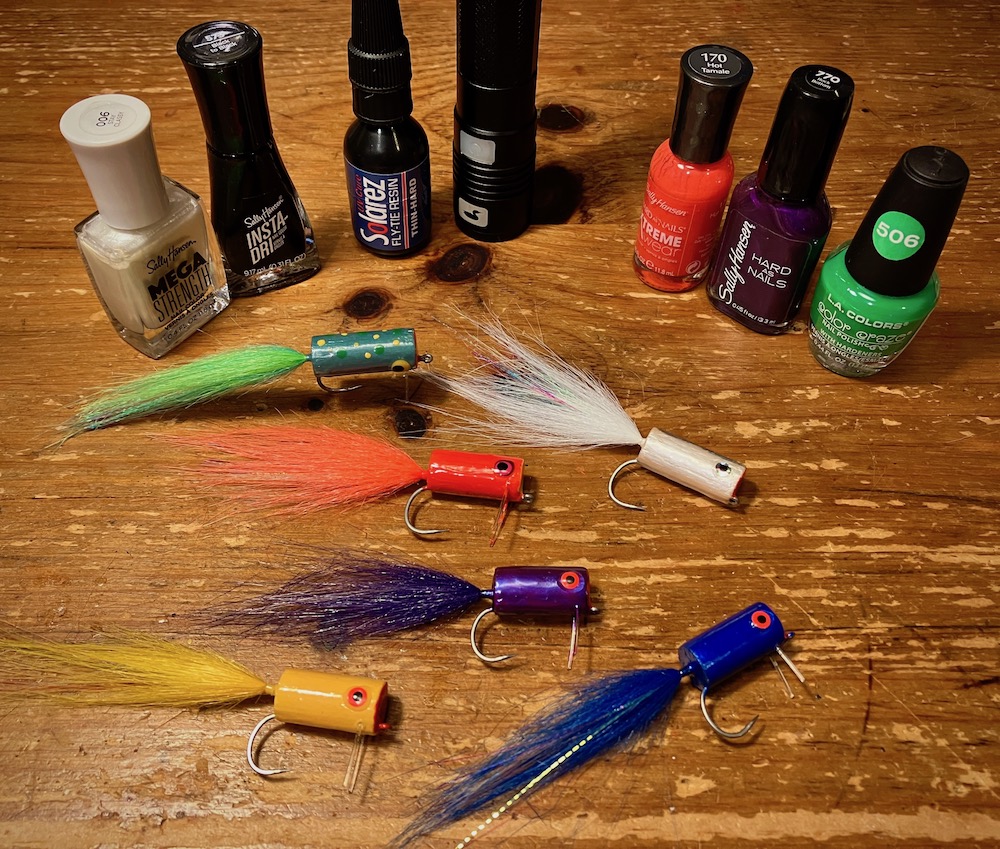
There are many situations in which nail polish can be used to add color and highlights to various flies. I often use straight black and white to make eyes on lead eyes. And of course, clear nail coatings like Sally Hansen's "Hard as Nails" makes an excellent glossy head on so many types of flies. Here's a set of balsa bass poppers decorated with more diverse colors - an additional trick is to overcoat a nail polish finish with one of the thinner uv resins - this stuff is super tough, and really protects the underlying colors. A great place to look for cool colors of nail polish is in the bargain bin at your local pharmacy; for UV Resins, try the "Thin" style of Solarez brand resin that you can find right here at Saltwaterflies.com
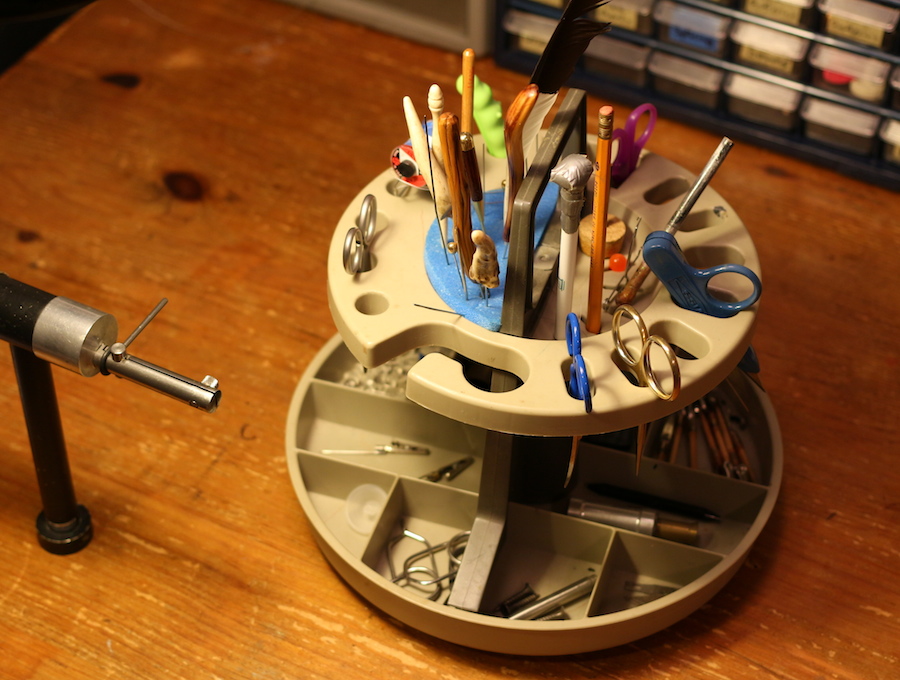
One of the very best organizational tools I ever found for the fly tying bench was this rotary tool caddy - these kinds of things are sometimes offered in art supply stores or craft stores. This particular design worked so well, I've been using it for more than 10 years now. The base rotates so if you need a tool on the far side of the caddy, you just give it a spin. Scissors, bobbins, pliers, bodkins, whip finisher, and many other odds and ends fit easily into the rack top or the cubby compartments on the bottom. A little handle on the top makes it easy to pick the whole thing up and move it. It never tips over, and there's a space for each different tool. This caddy takes up less space, and holds many tying tools much more efficiently than plenty of other "storage" solutions". It's easy for any storage unit to become a "catchall" over time, so it's a good idea to empty it completely once a year, vaccum the bits of hair and dust out, and replace only the tools used in the past year. Stuff that hasn't been used can get retired to some other location where it won't be taking up space in the rack.
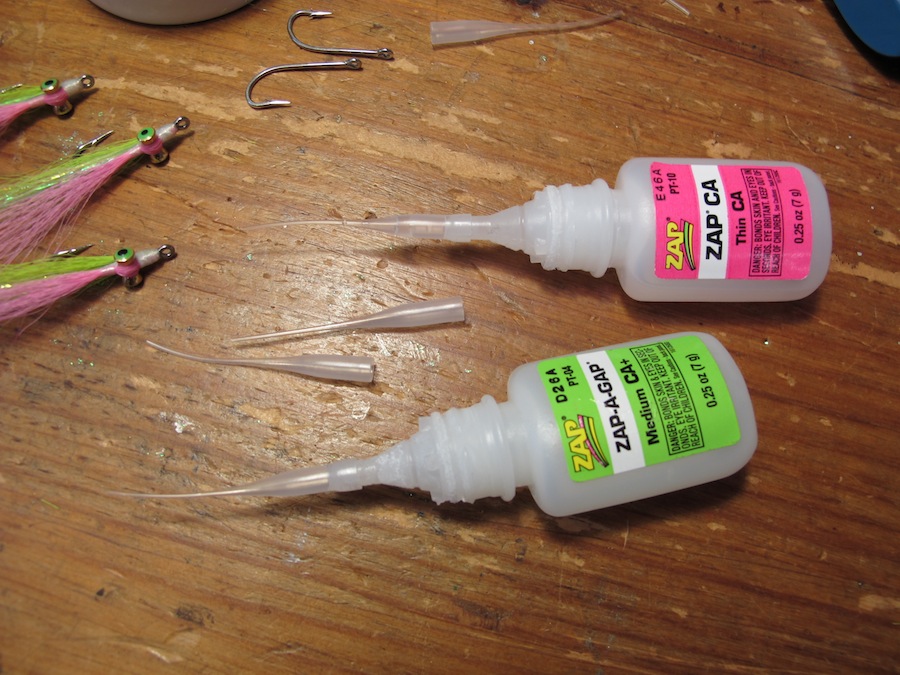
These days I'm often using one of the ZAP "super glues" to increase the durability of my saltwater flies - a quick hit on the thread wraps here and there makes the flies really tough! The green label stuff that we sell is basically all-purpose, and can even be used as a "head cement" to finish the fly. Anyway, the "trick" offered here is that ZAP offers what they call their "Extender Tips" or "Flexi Tips" - a very fine plastic nozzle tip that can be put on the super glue bottles, and left like this on the bench during tying - there's no need to keep putting the cap back on, as the nozzles can be left on for days without clogging. The "Zap A Gap" that we sell now comes packaged with a couple of these tips. I do keep a small rag handy to quickly clean up any spills and to keep the extender tips clean.
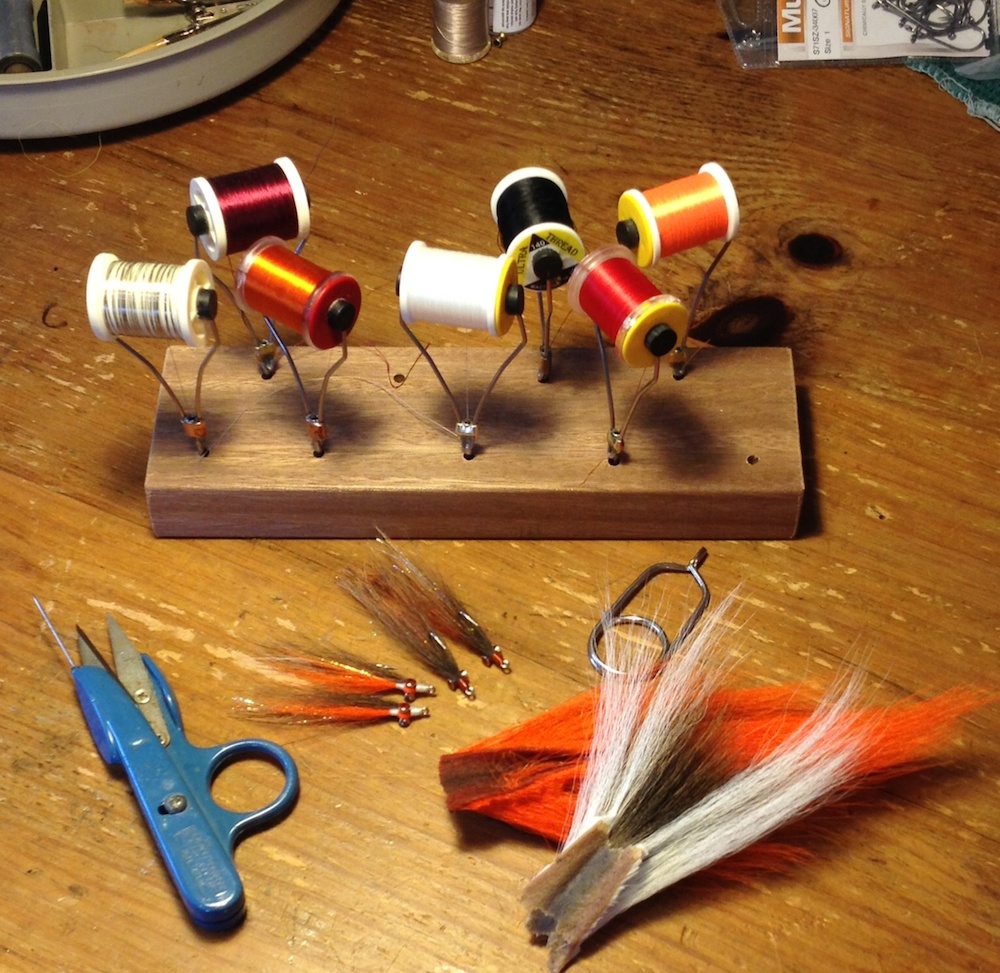
Here's a simple bobbin/thread rack to help keep the fly tying bench organized. I used to toss the bobbins in a drawer with all my other tools at the end of the day, but the bobbins and thread really got tangled up with the rest of the stuff. So, I made a very simple little rack to hold the bobbins by drilling some holes in a bit of hardwood - if you make the holes small - close to the diameter of the bobbin tubes, it keeps the thread in place nicely in the bobbin tube when the bobbin is in the rack. Some hard, heavy wood is better than something lighter, and I got the best results from a bit of wood that's just about an inch thick - it stays where I put it on the bench and doesn't get jostled around too much. The cost of this is virtually nil - just a scrap bit of wood with some holes drilled in it, but it sure made a difference in organizing my bench.
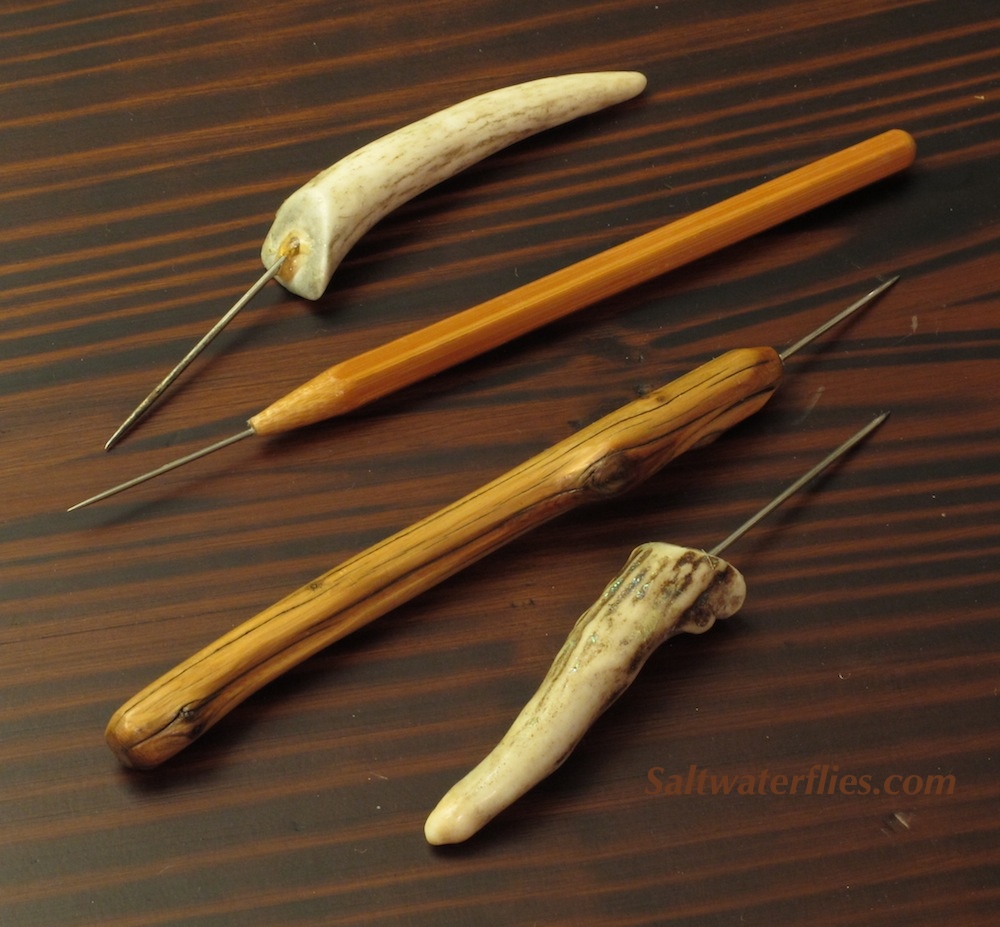
The best fly tying bodkins on my bench are usually the handcrafted ones. There's one with a handle made out of driftwood that my good friend and fishing mentor Don McCue made for me. Don's out in Montana now guiding trout fishing trips under the big sky. When he's not reeling in big trout, Don collects bits of driftwood from the riverbends and makes beautiful things out of them. There's a very sweet one made out of a length from an old split-bamboo fly rod that was given to me by a very kind and considerate customer. The ones with the staghorn handles were made by D.L.Goddard. I remember DL used to sell these at the fly fishing shows that go on here on the east coast in the wintertime - I recall paying about twenty bucks apiece for those, and they are worth every penny. The staghorn handles fit the hand really nicely and don't roll around on the bench too much. They each have their uses; if you want to make some of these yourself just go to a sewing supply store and get a small assortment of needles, find or make some handles that suit you, then drill holes in the handles and set the needles into them with some strong epoxy. I like to have a variety bodkins on hand, and it's nice to have some variety in the length of the handle, and also in the stiffness of the needle.
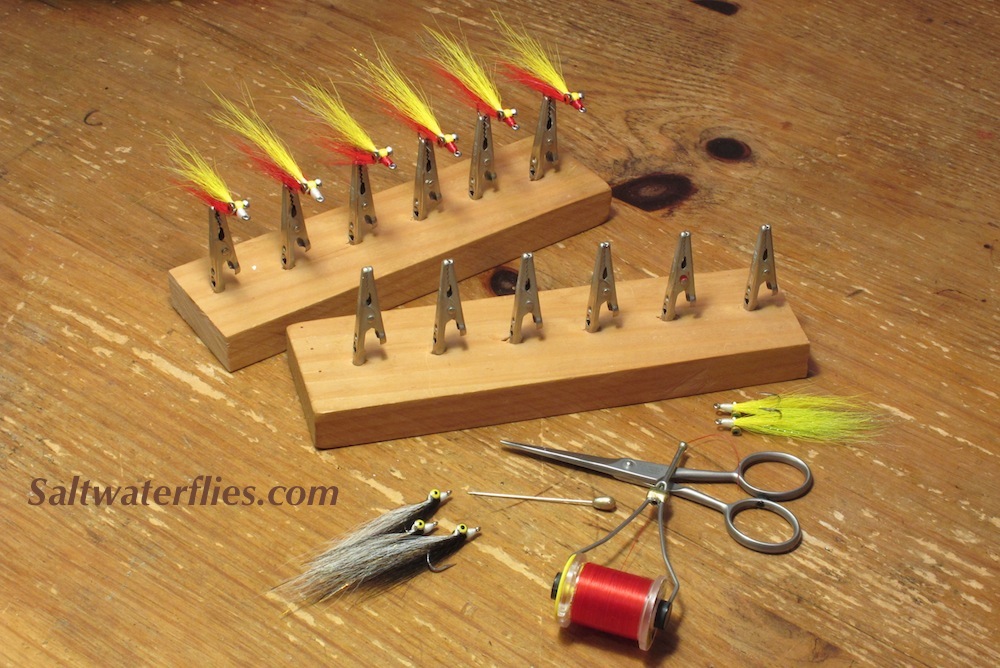
A very useful fly drying rack can be made quickly and cheaply from some scraps of 3/4" thickness pine and some "alligator clips" which are available at radio shack for just a coupla bucks. The clips have cylindrical bases that easily fits into a hole drilled to the appropriate size - I don't even glue the clips into the holes. We have all sorts of rigs to put our flies on as they dry, including drying wheels and other larger racks, but I find myself reaching for these again and again for many of the flies that I tie because they hold the flies very securely, and are so portable when I want to pick up a set of flies and move them away from the work surface until they dry completely.
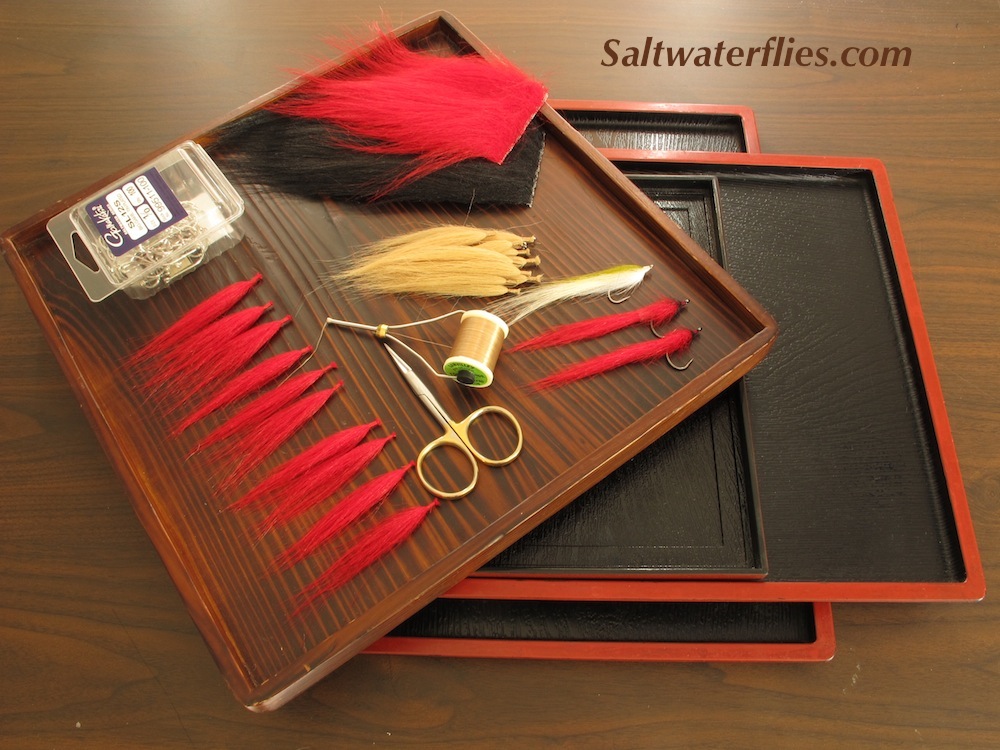
Here's a tip for anyone interested in keeping the fly tying bench organized. Any tier's tying space can quickly devolve into a huge mound of assorted tools and materials, especially if you get interrupted or have to stop in the middle of a tying session. An easy way to keep order is to use some small serving trays to hold groups of materials for various flies or projects you have going. If I have several things that I'm working on, I will keep the projects separate on these trays, and keep the trays on a nearby shelf - when I'm ready to get going on a particular fly or style, I will pull that tray down and get tying. Just watch out not to get too many trays going at once! I picked these trays up at a garage sale for like a buck each, and it made organizing my bench much easier.
All Images Protected by Copyright.