The Gotcha
Fly Pattern Tying Recipe
Fly tying recipe and photos by Blake Davis
Edited by Chris Windram
Home | Saltwater Flies | Fly Tying Materials | Saltwater Fly Fishing Accessories
Ordering Instructions, Shipping rates, Your Satisfaction Guaranteed | Site Map
Fly Pattern Tying Recipe
Edited by Chris Windram
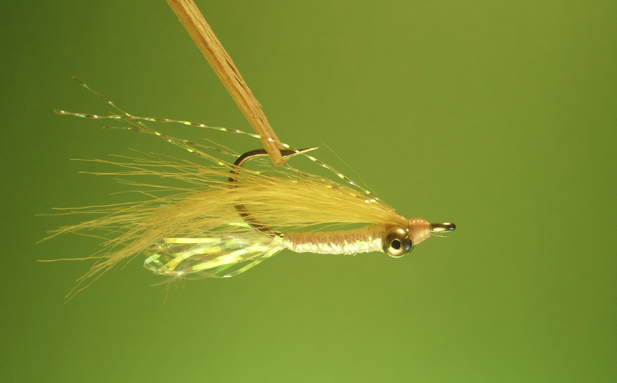
The Gotcha is perhaps the most popular bonefish fly ever designed, and has accounted for thousands of bonefish for anglers worldwide. This simple and very effective pattern belongs in the box of every bonefish angler, and tying the Gotcha in a variety of sizes, weights, and colors will help anglers match local fishing conditions. In our article we've tried to stick pretty close to the traditional dressing, but there's nothing wrong with experimenting with variations of this classic bonefish fly.
Tying the Gotcha
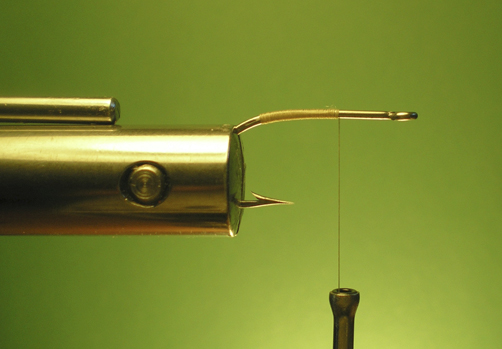
Step 1) Tie in tan thread, and coat the rear half of the hook shank with the thread. The rearmost thread wraps should not extend down onto the bend of the hook, but just cover the straight part of the hook shank.
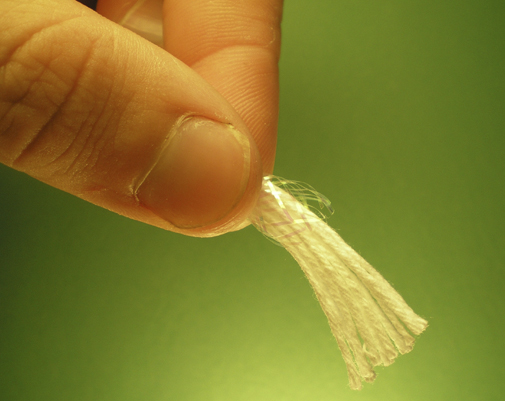
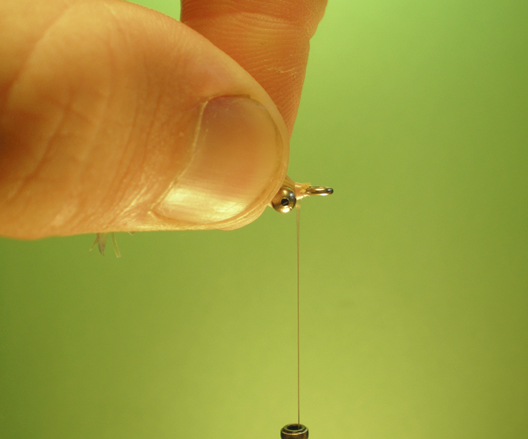
Step 2) Cut a piece of Braided Mylar Tubing (color Pearl, Size Medium) several inches long. Firmly grasp the tubing between your thumb and index finger, and pull out the cotton "core" completely. Discard the core.
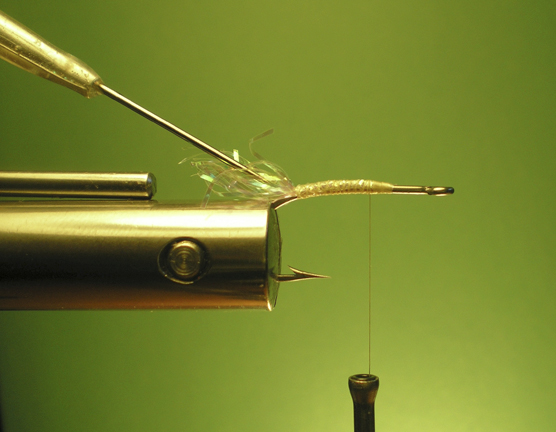
Step 3) Lash the tubing down along the top of the hook shank, and allow the tubing to extend out past the bend of the hook shank. Be sure to leave the front Ľ of the hook shank bare - this will allow room for attaching the eyes and wing later. Trim the tubing "tail" to about 3/8 of an inch, then unravel the fibers in the tail with the tip of a bodkin. If tying this fly in larger or smaller sizes, adjust the length of the tail accordingly.
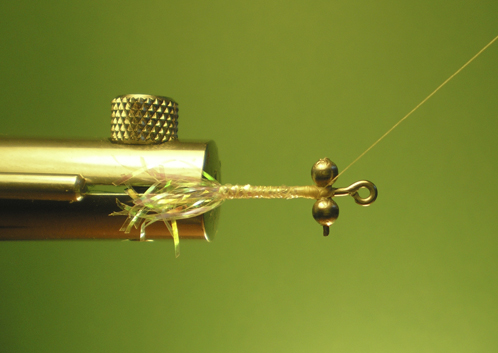
Step 4) Cut a pair of size medium stainless steel bead chain eyes from a length of bead chain. Hold the eyes directly on top of the hook shank, and make a series of diagonal wraps of thread around the hook shank and the center of the eyes (make 4-5 wraps of thread one way before wrapping diagonally from the opposite side). Adding a small drop of penetrating cement (like Dave's Flexament) to the crossbar of the eyes at this point will help improve durability, as subsequent thread wraps will drive the cement into the thread base. Continue cross-wrapping until the thread the eyes are firmly attached, then add one more drop of head cement to this area. (Note: for a fly that fishes deeper, a variety of small size lead eyes styles can be used instead of bead chain eyes. Other colors of bead chain can be used as well - these are often not stainless, so coat them with Loon Hard Head or some other clear coating when the fly is completed to prevent corrosion).
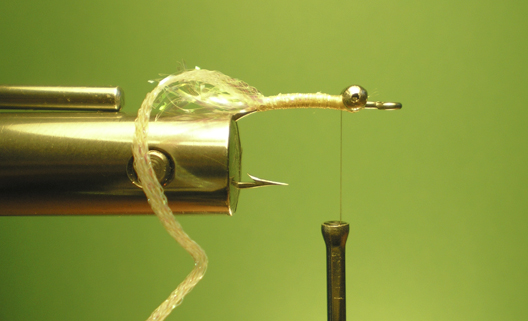
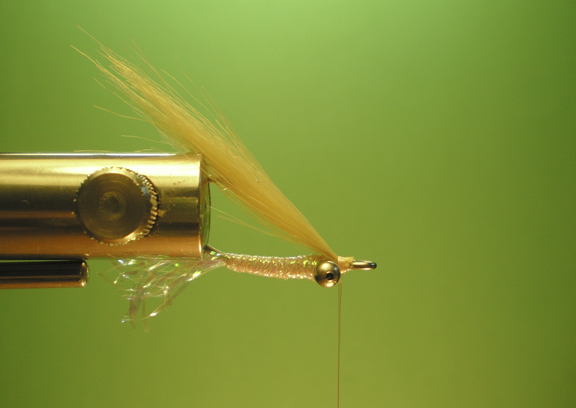
Step 5) Cut a piece of pearl braid that is approximately four inches long. Lash this braid to the top of the hook in the space between the tail and the bead chain eyes. (Note: shown here is HT Braid Pearl, but there are lots of different braid materials that can be used, including Diamond Braid, or Flat Diamond Braid, Bill's Bodi Braid, and more).
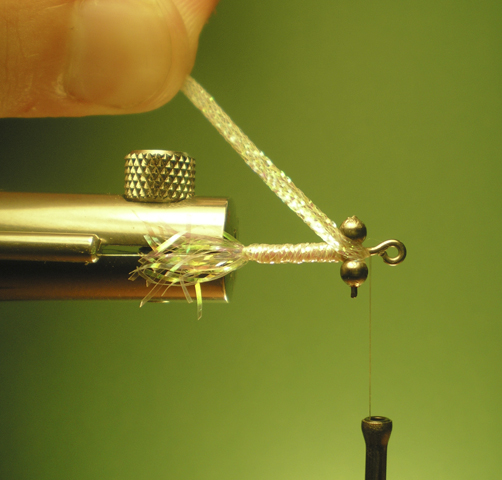
Step 6) As you wrap the braid forward, overlap each turn slightly. Wrap the braid under and then in between the eyes. (Nothing wrong with trying some other colors of braid for the body - a gold body is a nice variation).
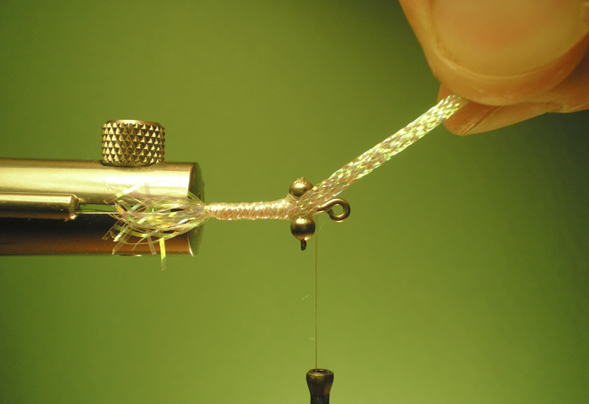
Step 7) Bring the braid under the body just behind the eyes, and then cross over forward in between the eyes. Tie down the braid in front of the eyes, then whip finish and switch to pink thread.
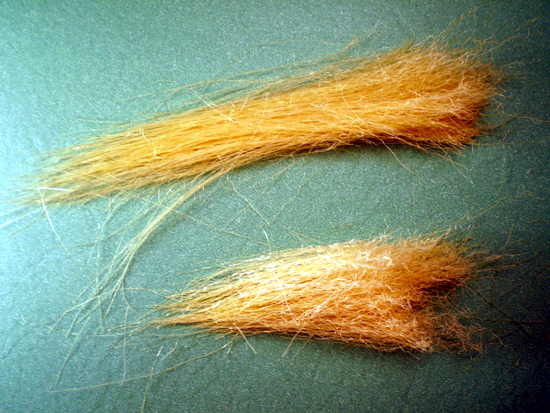
Step 8) Cut a clump of hair from a patch of Tan Craft Fur (shown here is the "Golden Tan" color of Craft Fur Plus). How much hair you clip out in a clump depends on how full you want to tie the wing, but clip out a clump maybe the diameter of a pencil to start with - different tiers prefer different levels of sparseness in the wing, so this part is really up to you, but be careful of making the wing too full. Firmly hold the tips of the craft fur fibers between your thumb and index finger. With your other hand, remove the shorter fibers by grasping and preening the hair below your thumb and index finger. You should end up with two piles of hair. The top clump shown in the photo is ready for use. The smaller pile needs to be cleaned again before it can be used, but you can sometimes get more than one fly from a clump of craft fur. "Craft Fur Plus" is a good product for this fly, but there are plenty of other craft fur type products that can be used, including "Pseudo Hair", and Seel Fur (Seel Fur is is nice and shiny, but rather short in length, and good only for smaller sized flies).
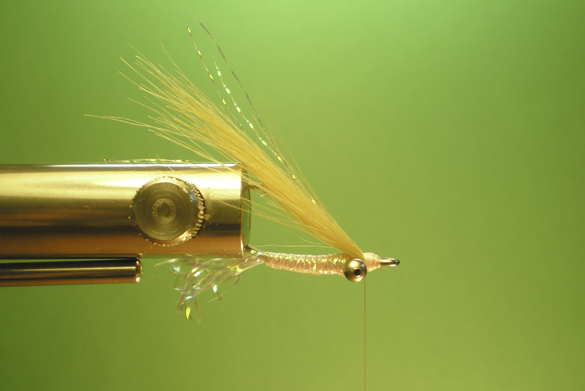
Step 9) Rotate the vise or flip the fly over in the jaws so that the hook point is now up. Pinch the base of the craft fur clump into a tight bundle, then tie it in on the top of the hook shank just in front of the bead chain eyes. If any of the craft fur hairs extend forward over the hook eye after being tied in, trim these off.
Step 10) To acieve the proper proportions for the length of the craft fur "wing", the wing should extend out just slightly past the tail after it is tied in.
Step 11) Add several strands of Krystal Flash in the Gray Ghost or Pearl color on top of the craft fur wing, then whip finish the thread, and coat with Loon Hard Head, clear nail polish, or other clear head cement. Adding several coats of Hard Head will give the head a nice, glossy finish, and make the fly more durable - there's nothing wrong with adding a drop or two of head cement to the body braid where it crosses between the eyes, as this part of the fly can tend to wear out when the fly is fished (it may be subject to abrasion by sand or coral as the fly bounces along the bottom).
Step 12) The finished fly - The Gotcha. This fly when tied properly will ride hook point up, which helps prevent snagging on the bottom. If weeds or coral will be an issue in the locations that you plan to fish, consider adding a monofilament weedguard as the last step - a bit more space will have to be left for this, so keep this in mind when tying in the wing and eyes if a weedguard is needed. Don't hesitate to experiment with alternate wing & body colors - many of the craft fur and body braid materials are available in a variety of nice tans, pinks, and oranges which could be used to good effect for the Gotcha. It's also nice to have a variety of sizes available from #8-#2, and this fly can be made unweighted by omitting the bead chain eyes, or made in heavier versions for windy days or deep water by using lead eyes instead of bead chain.
Saltwaterflies.com would like to thank Blake Davis for submitting this excellent article.